During this age of digital innovation, the ability to record minutes on your iPhone has developed into an essential component of our day-to-day presence. Whether it’s to share tutorials, give a detailed account of gameplay, or save turn conversations, screen recording has turned into an essential feature. So how to screen record on iPhone? We are fortunate that iPhones come pre-installed with an easy-to-operate screen recording function. In this section, we will walk you through the steps that are required to add, activate, and use the screen record feature on your iPhone, with a special emphasis on step 13.
Adding Screen Record To Your IPhone
Prior to continuing with the course of screen recording on your iPhone, you want to make sure that the screen recording feature is already there in your Control Center. On the off chance that it isn’t, you should add it. Offer me the chance to explain how to add screen record on iphone.
1. To start, launch the Settings application on your iPhone.
2. Peer down and tap on “Control Center.”
3. Just pick the option that says “Customize Controls.”
4. Look down until you reach the “More Controls” section, and then search for the “Screen Recording” option.
5. To add “Screen Recording” to your Control Center, tap the green icon in addition to the Record icon that is located near it.
Activating Screen Recording On IPhone
You will actually want to start recording your screen once you have finished the most common way of adding the screen record feature to your Control Center. You know how to record a screen on iPhone but now is the time to move on to the next step by activating the screen recording on iPhone. The accompanying fundamental steps will carry you to your destination:
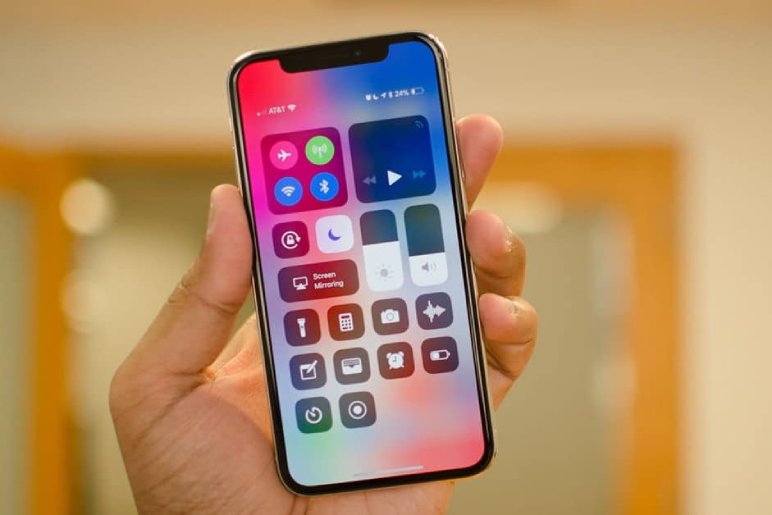
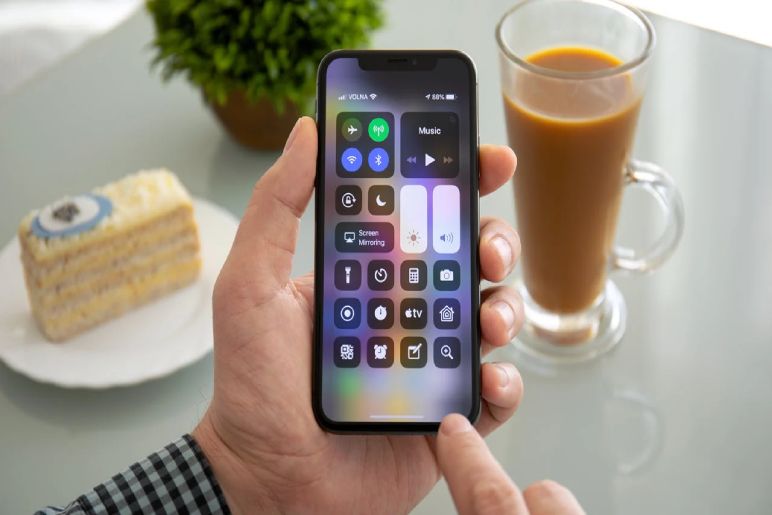
1. To activate the Control Center on your iPhone, swipe downward from the top-right corner of the screen.
2. Locate the icon that looks like a circle with a piece within it. A “Screen Recording” icon is the name given to this particular icon.
3. To start, tap the Screen Recording icon.
Before your iPhone starts recording the screen, it will start a countdown that will last for three seconds. This will happen before the recording starts. You will actually want to navigate to the application or screen that you want to capture assuming you continue in this manner.
Recording Your Screen On IPhone
The screen recording capability of your iPhone has been activated, and that means that you are right now able to record anything that is displayed on the screen of your iPhone. Frequently achieved by following the steps for how to screen record on iphone 13 and recorded beneath:
1. The status bar at the top of your screen will turn red after tapping the “Screen Recording” icon in the Control Center, which shows that the recording is currently being finished.
2. To start and end the recording, tap the red status bar that is situated at the actual top of your screen. You also have the option to return to the Control Center and tap the “Screen Recording” icon once more.
3. The recording of your screen will be saved to the Photos app on your gadget, and there will be almost no additional steps required to finish the interaction.
Using Screen Recording On IPhone 13
When compared to its predecessor, the iPhone 13 comes furnished with a substantially superior screen recording feature that is incorporated as standard. This feature gives a significantly greater variety of features. Coming up next are a couple more strategies that can be used to work on the overall experience of recording your screen on an iPhone 13:
1. Recording Options: With iPhone 13, you may decide to capture the whole screen or only a section of it. You may access these decisions by essentially tapping and holding the “Screen Recording” icon that is located in the Control Center.
2. Record External Audio: The iPhone 13 enables you to record external audio, for example, your voice or the sound being delivered by an application, while you are recording your screen. Long-squeezing the “Screen Recording” icon in the Control Center will allow you to activate this option. Once you have done this, hit the microphone icon to turn the audio recording capability on or off using the toggle switch.
3. Edit and Share: After you have wrapped up recording your screen, you can easily edit the video by using the verifiable editing tools that are remembered for the Photos app. Trim the footage, add annotations, or overlay text prior to sharing it with companions or setting it up on social media.
Exploring Advanced Screen Recording Features On IPhone 13
The key screen recording function on the iPhone is clear and easy to use; in any case, the iPhone 13 presents a couple of significant level features that move forward the nature of your recording experience. How about we go over these features in more detail and how to screen record on iphone.
Customizing Recording Options
Contingent upon your inclinations, iPhone 13 permits you to re-try your screen recording options. It is workable for you to fit your recordings to meet your necessities, whether or not you really want to record the entire screen or only a specific portion of it. To get to these customization options, basically, press and hold the “Screen Recording” icon situated in the Control Center for a considerable measure of time. You will be given a menu that gives you the option to all things considered “Record Selected Portion” or “Record Entire Screen.” Select the setting that best suits your requirements, and the recording of your screen will respond as needed.
Recording External Audio
The ability of the iPhone 13 to record audio from an external source is one of the most eminent features of the screen recording highlight this year. This implies that you can catch not simply the visuals that are shown on your screen but additionally, any audio that is going on, for example, your voice or the audio impacts that are created by an application. By holding down the “Screen Recording” icon in the Control Center for a drawn-out timeframe, you can empower external audio recording. The microphone icon will be toggled on or off, and a menu will appear for you to choose from. Your iPhone will record audio from the gadget’s microphone when the red screen recording icon is on.
Enhancing Your Recordings with Editing Tools
After you have wrapped up recording your screen on an iPhone 13, you have the option of enhancing your recording utilizing the editing tools that are accessible within the Photos app. Using these tools, you will actually want to deal with the recording, add annotations, overlay text, and even apply filters to get the ideal appearance and look stylish. It is important to use the Photos app and find the recorded video inside your library to edit your screen recording. Tap on the video to open it, then, at that point, pick “Edit” from the menu. From this location, you approach the editing tools, which permit you to make modifications to your recording as per it before then saving or sharing it.
Sharing Your Screen Recordings
After you have wrapped up editing your screen recording to perfection, the best opportunity to share it with the remainder of the world is at that time. Your recordings might be effectively shared to different stages, such as social media, messaging apps, and email, straightforwardly from the Photos app on the iPhone 13, which simplifies it to do as such. During the time that you are surveying your edited recording in the Photos app, just hit the “Share” button. You can pick the stage or app with which you wish to share the recording from this location, and then continue to follow the on-screen prompts to finish the sharing framework.
Conclusion
Thanks to the natural capabilities that are incorporated into iOS, Screen Rate on iPhone has never been less difficult. You will actually want to add, activate, and use the how to screen record on iPhone by following the basic steps that are explained in this guide. This will allow you to easily capture and share your favorite minutes.
Also Read:-
- Saying Goodbye: How to Remove a Microsoft Account from Windows 10
- Saying Goodbye to Facebook Dating: A Step-by-Step Guide
- Mastering The Space: How to Double Space in Google Docs